Content
The Content tab contains a content information drop-down menu with the following choices: coverage description, feature catalog description, and image description. Multiple are allowed. Choosing one results in fields specific to each.

An official website of the United States government
In both simple and full template views, users can hover over a section
to see the hierarchy of how that field or section is housed. A tan
background will appear behind all child sections of metadata. If the tan
background only appears behind the single field a user hovers over, that
means the field is the lowest in that section and has no child fields
related to it. Users may also expand or collapse these metadata sections
by clicking on the black triangle to the left of each section title.
Click on the red X to the right of any field or group of fields to remove
them from the metadata form.
A red asterisk means the field is essential.
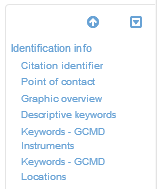
A navigation panel also appears to the bottom right of the browser window in both simple and full template views. Click on any section title in this navigation panel to go to that section of the form. Click the solid “down” triangle in the top left of the panel to show/hide the navigator. Click the “up” arrow on the navigation panel to instantly go to the top of the metadata form page.
This is the default view of the create dataset form. NAL GeoData
curators recommend users begin with this view, as the critical
information is here. A red asterisk (*) next to a field means that field
is essential for validation. Note that validation hinges on many
contingencies, but these fields must have values regardless of other
conditions. In any views, to remove a section of the template metadata,
click on the red X to the right of the section that appears when
hovering the cursor over that section. Collapse or expand metadata
sections by clicking on the section title. Click on the + button at the
bottom of each field or section to add or duplicate that field or section.
Only fields or sections that allow multiplicity can be duplicated.
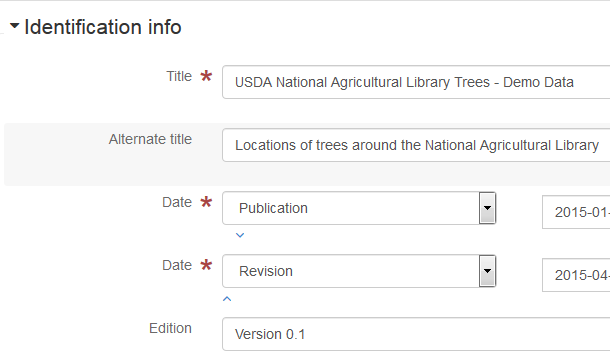
This section consists of the dataset title, publication and / or
creation date, edition, purpose, status, and an abstract describing the
data. Title, date, and abstract are all essential fields and must be
completed. Add multiple types of dates (Publication, Creation, or
Revision) by clicking on the + button under the field.
This is the contact who can best answer questions about the data. Either
an organization name or an individual name must be specified for the
document to validate. A variety of roles can be chosen from a drop-down
list, including Point of Contact, Author, Originator, or Publisher.
Choose the role that is most appropriate for the person who will field
questions about this data. Users can add multiple points of contact by
clicking the Add contact button at the bottom of this section.
Contact fields support reusable components, which are covered in more detail in the GeoData Reusable Metadata “Snippets” section of this manual.
Maintenance and update frequency must be chosen in this section as well,
along with an individual or organization that will be responsible for
maintaining the data. Add this role by clicking on the Add maintainer
button and adding a metadata author in the same manner as with the point
of contact above.
This file provides the image seen on the record display page in the upper right. If users have an image that they would like to display with their record, they can link the thumbnail and large thumbnail here. Using the Associate Resources section on the top right side of the screen it is possible to upload thumbnails or other documents and link to them.
This section contains all of the keyword tags assigned to the record. One keyword can be added per field without being associated with a thesaurus, with multiple allowed. Keywords can also be added from controlled vocabularies that are pre-loaded into the NAL GeoData system. Users can work from multiple thesauri or can be added free-text terms as needed. See the GeoData metadata keywords section of this manual for more details.
This section outlines the copyright, use constraints, and any other
constraints for the record and data. Both Access constraints and Use constraints
consists of a drop-down menu where the user chooses the most appropriate
constraint from the list, including whether the contents of the record
are copyrighted, licensed, patented, etc. An Other constraints section
provides a free-text field where the user can specify constraints and
conditions of use.
This section notes the number of pixels utilized in construction of a digital image. This is represented by a fraction, 1/xxx. Recommended choices appear in the drop-down menu, though users can enter a custom value of the denominator (with the 1 assumed to be the numerator) in the free-text box. A higher spatial resolution means a greater number of pixels / higher quality image.
This section is a drop-down menu of high level keywords associated with
geospatial data. Choose one from the list, and add additional Topic
category fields by clicking the + box at the bottom of the section as
needed to assign multiple topic categories.
This section consists of the temporal and geographic extent of the data collection or experiment,
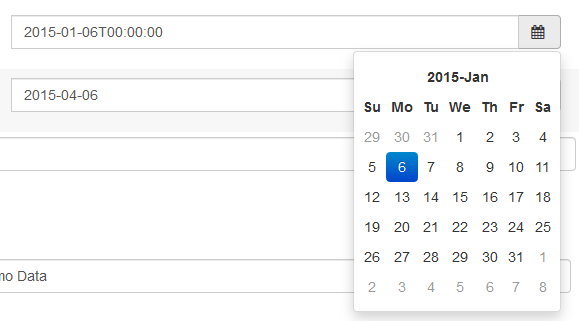
This specifies the start and end dates of the data collection or experiment. This section is essential. Enter the dates in the format MM/DD/YYYY or click on the calendar icon at the right side of the field to bring up a calendar where users can choose the date.
If data collection is ongoing, use the special value (“nil reason”) of “Now” instead of a set end date.
Access the option to add “Now” as the end date in the Change view menu (looks like an eye) in the upper right hand side of the form.
In the drop down choices, choose the More details option to add these new value options to your form.
A Indeterminate position button should now be below the date fields.
After choosing this, users must use the Save metadata button at the top right of the page to activate the alternate date value options.
From there, a drop down menu with options like “Before” and “Now” will be visible under the date field and are able to be selected instead of filling in a specific date.
The Geographic extent can be represented in one of several ways. A
drop-down menu allows users to choose a region from the list. Choices
include lists by country, continent, or Geonames.org. Users may choose
to manually draw a bounding box by clicking on the orange Draw extent button
to the right of the region drop-down field, and then click and drag the
box over the map below the field. Users can also choose to enter
coordinates for latitude and longitude in the coordinate boxes to the
top, bottom, left, and right of the map display. Users should only pick
one of these three methods of adding a geographic bounding box.
A Supplemental information field allows users to add free-text information about the geographic extent of the data.
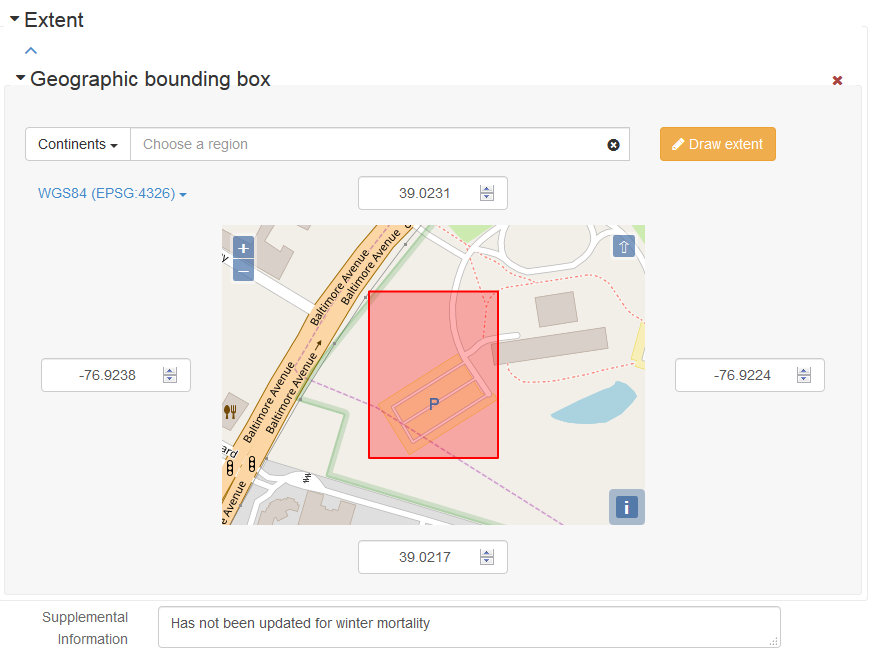
WGS 1984 is the default and most common choice here. However, users can change this value if required.
This section outlines the various resources attached or linked to the data record.
The format of each resource must be specified in order to validate the
record. Use the first + symbol next to the Distribution format label to
add a new format. Use the second + symbol under Distribution Information
to add a Distributor Contact. Fill out the organization name, individual
name, email address, and role of the resource contact. The Role field is
a drop-down menu, and the other fields are free-text. This contact will
be the individual or organization responsible for the web site, file, or
other resource linked to this record.
This section holds the location of the linked resource. Protocol indicates whether the resource is HTML, WMS, a direct download, and so on. Next, choose the appropriate format from the recommended values drop down. Then include the web address in the Linkage field, and the name of the resource. The name chosen here will show up in the metadata display for this record. Delete any protocols not needed by clicking the red X to the right of the field.
This section specifies the hierarchy level and lineage of the data record. Hierarchy level consists of a drop-down menu containing many choices including dataset, attribute, model, service, and software. The fields in this section outline the chain of custody and integrity of the data.
The Lineage field offers a free-text space to record a statement about the data’s chain of custody. This will include the individual or organization that created or recorded the data, who has maintained the data, and how the data arrived at its current location. Any additions or modifications to the data should also be noted.
Note
This section can only be found in the “Full View” until at least one process step is added. At that point the section will show in the “Simple View”.
This section includes a free-text description of the actions performed
on the data, the rationale behind the action, the date/time the action
was performed, the name and contact information of the processor, and
the source of the action. The Processor section can be filled in like
any other contact section – if a pre-existing reusable component has
been saved, that can be accessed by tying the name into the Search for
a contact field. Name, organization, phone, email, and other
information can also be typed into the fields manually. Give the process
step a title in the field provided. Multiple process steps are allowed.
The Source section can be accessed in full through the full view, and
includes a description, scale denominator, reference system, citation,
extent, and step fields. Reference system is an identifier with a title
/ alternate title, date, edition, identifier, presentation form, series,
ISBN/ISSN, and several other fields. This section also has a space to
include a responsible party using the same contact section rules as
outlined above. While these fields are not essential, filling in one
section may require that certain other sections be filled in
accordingly. The “Data Submission Checklist” section of this manual
explains how to review the metadata for completeness and validity.
This group of fields will be used to indicate the individual or
organization that performed an action on the data. The Processor
section can be filled in like any other contact section – if a
pre-existing reusable component has been saved, that can be accessed by
tying the name into the Search for a contact field. Name,
organization, phone, email, and other information can also be typed into
the fields manually.
Contact fields support reusable components, which are covered in more detail in the GeoData Reusable Metadata “Snippets” section of this manual.
This section records the individual or organization responsible for the creation and maintenance of the metadata record, as well as the information about the metadata record itself.
The unique file identifier, language, date stamp, standard name and version, and any hierarchy information are all located in this section. For the most part, these fields are auto-populated when the metadata record is created and will not be changed.
Parent identifier allows users to link the current metadata record to an umbrella record, allowing metadata records to display hierarchies. In order to add a parent identifier, click on the button and paste or type the UUID into the field. This allows the parent record to show up as a link on the record display page.

A hierarchy level and hierarchy level name field are available by
clicking the + button next to each label. Hierarchy level is a drop-down
menu, while hierarchy level name is a free-text field. This enables
users to specify how the current record might relate to a parent record
in the type of data the current record offers.
Metadata author should be filled out according to who should be contacted about the metadata record, and not necessarily the data linked to the record. The person who authored the metadata record, the organization the record was harvested from, or the person or organization who serves as point of contact for the metadata can be listed here. Multiple metadata authors are allowed. The organization name, individual name, and email address are all free-text fields, while role is a drop-down menu with choices such as point of contact, author, and distributor. Add multiple metadata authors by clicking on the add author button.
If a metadata author has a reusable component stored in NAL GeoData,
begin typing the individual or organization name in the Search for a
contact field and choices will auto-populate. Click on the appropriate
contact and choose a role to add that component to the metadata record.
If adding an author from scratch, choose the +Add author button to add the author.
Contact fields support reusable components, which are covered in more detail in
the GeoData Reusable Metadata “Snippets” section of this manual.
The full view separates out various metadata record sections into categories and offers a more comprehensive look at the available metadata fields. Some of the metadata content fields are only available in full view as opposed to simple view. Others will not show in simple view until they are added in full view, after which the populated fields appear in their respective sections of the form. The list below outlines a list of fields from each of the sections. Click on the tabs at the top of the page while in full view to access each section.

The Identification tab contains the following sections:
Citation: contains the record title, alternate title, date, edition, responsible party, presentation form, series, ISBN, ISSN
Abstract, Purpose, Credit, and Status. Status is a drop-down menu with choices like on going, completed, or under development.
Point of contact: contains responsible party fields with name, organization, contact address, phone, web site, and email. Also available are a contact instructions and hours of service field. If a contact’s information is already stored as reusable components in NAL GeoData, scroll to the bottom of the section and begin typing in the search box to bring up related components. Begin with the overall contact at the very bottom of the section in the field labeled “Add contact” to add all portions of this pointof contact section at once, or add an online resource link separately by using the search field at the bottom of the onLine resource section.
Resource maintenance: contains maintenance information, including maintenance and update frequency (a drop-down menu), date of next update, user defined maintenance frequency, update scope, update scope description, maintenance note, and maintenance contact. Search for existing contacts in NAL GeoData reusable components by typing in the Search for a contact field and click on the link button in the appropriate contact to designate their role.
Graphic overview: contains file name, file description, and file type for the large and small thumbnail associated with the data record.
Descriptive keywords: contains the keyword fields from the simple view, along with a thesaurus name section to enter details about controlled vocabularies.
Resource constraints: contains legal constraints fields with use limitation, access constraints, and use constraints
Aggregation information and spatial representation type
Spatial resolution: contains equivalent scale representative fraction and spatial resolution
Topic category code
Environment description
Extent: contains temporal extent with begin and end dates, vertical element, and geographic extent description, geographic bounding box (region drop-down, latitude/longitude coordinates, and draw extent tool. Search for existing reusable extent components by typing them into the “search for extents” box.
Supplemental information
Add a new Identification info section and duplicate everything in this
tab by clicking on the + button at the bottom of the page.
The Distribution tab contains the following sections:
Distribution format: contains name / recommended values, version, amendment number, specification, file decompression technique, and format distributor
Distribution contact: contains the same fields as other contact fields. See Point of Contact in the previous tab section for instructions on fields and adding information from reusable components.
Transfer options: contains units of distribution, transfer size,
online resource (which contains linkage, protocol / recommended
values, application profile, name of the resource, description, and
function. Add reusable components using the searchAonLine box and
clicking the + button of the appropriate search result.
Note
See _geodata_data_quality: for more details.
The Quality tab contains information about the quallity of the data. I consists of the the scope and lineage sections. Inside those sections include:
Scope > Hierarchy level: a drop-down menu containing many choices including dataset, attribute, model, service, and software
Scope > Extent: consists of a free-text description field, and drop down menus for geographic element, and temporal element field, as well as a vertical extent minimum and maximum value field
Scope > Level description: a drop-down menu with choices like dataset, attributes, or features
Report: a definition of the type of quality control conducted, consisting of a drop-down menu with choices like domain consistency, format consistency, temporal validity
Lineage > Statement: a free-text space to record a statement about the data’s chain of custody
Lineage > Process step: consists of a free-text statement field to describe the chain of custody or action performed, and options to add process step or source. Process step includes a free-text description field, rationale, date/time, processor (the individual or organization that conducted the process step), and source, all of which expand to reveal more relevant fields (some outlined in the simple view section above).
Lineage > Source: consists of a description, scale denominator, source reference system, source citation, source extent, and source step fields. All can be expanded to reveal relevant fields within each section.
Add additional Data quality info sections by clicking the + button at
the bottom of the page.
The Spatial rep. tab contains a drop-down menu with the following
choices: Georectified, Georeferenceable, Grid spatial representation,
and Vector spatial representation. Choosing any of these results in more
fields related to each option. Multiple are allowed by clicking the +
button at the bottom of the page.
The Ref. system tab contains the following fields:
Authority: this field is a citation field with the ability to add a responsible party from reusable components or from scratch by filling in the fields
Unique resource identifier: this is pre-filled to WGS 1984 for ISO 19115 templates, or users can enter their own value
Codespace: can choose from recommended values or enter a value into the free-text field
Version: a free-text field to enter the version of the reference system used
Reference system information: the option to choose the reference system identifier from a drop-down list if one exists
The Metadata tab contains the following fields:
File identifier: the assigned UUID for the dataset/metadata in the NAL GeoData portal
Metadata language: defaults to English, but can be changed
Character set: defaults to UTF8 but can be changed via a drop-down menu
Parent identifier: the UUID of another data record that is the parent record to the current data record
Hierarchy level: a drop-down menu with choices like Dataset, Model, Software, etc.; multiple are allowed
Hierarchy level name: a free-text field for the name of this instance; multiple are allowed
Date stamp: the date and time the record was created –the calendar icon to the right of the field allows users to choose the date which will propagate in the correct format
Metadata standard name: auto-populates based on the selected template, but can be changed
Metadata standard version: auto-populates based on the selected template, but can be changed
Responsible party: this contact field can be filled in like any other contact field for the individual or organization responsible for the metadata record – either through a reusable component or manually filling in the individual name, organization, and position name, as well as the contact information and role.
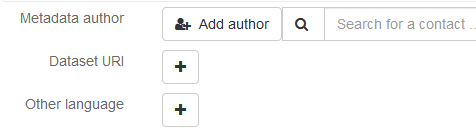
Metadata author: this contact field can be filled in like any other contact field for the individual or organization credited with creating the metadata record – either through a reusable component or manually filling in the individual name, organization, and position name, as well as the contact information and role, which in this case would be Author.
Dataset URI: contains the Uniform Resource Identifier if one exists
Other language: can be added if record is available in additional languages
The Content tab contains a content information drop-down menu with the following choices: coverage description, feature catalog description, and image description. Multiple are allowed. Choosing one results in fields specific to each.
The Portrayal tab contains portrayal catalogue info which leads to a citation section with applicable fields common to other citation fields previously outlined.
The Md. constraints tab contains a metadata constraints drop-down menu consisting of constraints, legal constraints, and security constraints. Choosing one results in fields specific to each. Multiple are allowed.
Constraints: consists of use limitation, a free-text field
Legal constraints: consist of a free-text use limitation field, access constraints drop-down menu, use constraints drop-down menu, and an “other constraints” free-text field.
Security constraints: consists of a use limitation free-text field, classification drop-down menu, user note free-text field, classification system free-text field, and handling description free-text field
The Md. maintenance tab contains a metadata maintenance section consisting of:
Maintenance and update frequency: a drop-down menu consisting of frequency choices such as annually, monthly, quarterly, etc.
Data of next update: click on the calendar icon to choose between date or date and time. Then click the calendar icon to the right of the field and choose the appropriate date to populate the field in the correct format.
User defined maintenance frequency: click this section to open boxes to enter years, months, days, hours, minutes, and seconds for a custom maintenance frequency schedule
Update scope: a drop-down menu consisting of scope code or gmx:MX_ScopeCode. Choosing scope code results in a drop-down menu with choices like dataset, model, or service.
Update scope description: clicking on this choice results in a drop-down menu with choices like dataset, features, or attributes. This choice results in an additional free-text field to name the choice.
Maintenance note: a free-text field to add information about the maintenance of the data
Contact: this contact field can be filled in like any other contact field for the individual or organization responsible for the maintenance of the metadata record – either through a reusable component or manually filling in the individual name, organization, and position name, as well as the contact information and role.
The Schema info tab contains an application schema info section consisting of:
Citation: contains the record title, alternate title, date, edition, responsible party, presentation form, series, ISBN, ISSN
Schema language: a free-text field
Constraint language: a free-text field
Schema ASCII: a free-text field
Graphics file: will only allow editing if a file has been uploaded
Software development file: will only allow editing if a file has been uploaded
Software development file format: a free-text field
Multiple are allowed and can be added by clicking the + button at the
bottom of the page.